Texture on Trend
05 May 2022
DIY plaster art is easier than you think
By Shelby Simon
Photo by Lauren Bleackley @blackwithnavy blog
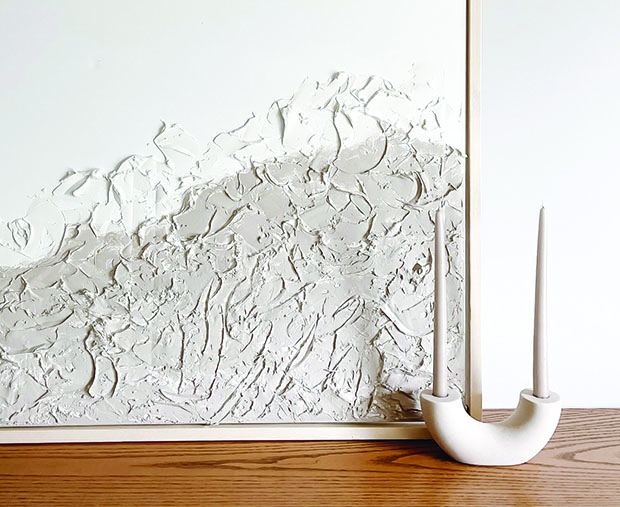
Anywhere art can go, so too can plaster: the simple, finely-ground stone medium is trending in the interior design world for its versatile appeal.
The environmentally-sound, nontoxic material can add texture to existing blank slates and be treated in any number of ways to add color, paint or construction inside or outside the home.
With infinite possibility and much to be gained, it’s no wonder DIY plaster art is making a statement as a trend in home design trends. And, it is a fundamental part of local history.
“Although plaster is a centuries-old building technique, it is still used architecturally in modern homes today,” says North Charleston-based artist Morgan Kinne. “Using plaster as a design element or to create artwork can act as a bridge between the historical and contemporary, something that is constantly at play in a city like Charleston.”
Kinne, formerly a studio artist at Redux Contemporary Art Center and the recipient of the 2020 Gryffyth-Reyburn Lowcountry Artist of the Year grant, has spent the last several years developing her own process of painting and printmaking on plaster. From her home studio, she casts plaster tiles in large-scale art installations.
“My process is tactile, expressive and experimental,” she says. “While the (plaster) work may be unmistakably Charleston, its roots are archetypal and can be translated anywhere: history and culture is evident in the built walls of a town.”
The historic building technique has a lot of relevance in contemporary homes.
“As a design element, the options are endless,” says Kinne. “You could incorporate texture and sculptural effects into the walls, molding and stairs. It can even be waterproofed and used outside.”
Bringing this technique into your own home is easier and less expensive than you might think: to add plaster as texture to an existing surface, the only list of materials you’ll need is plaster powder (such as a 25lb bag of Plaster of Paris, which goes for $20-25), water and a bowl or bucket for mixing.
Plaster can be messy, so have some drop cloths on hand, plus a dust mask if working in an unventilated area. Not to worry if it gets on your skin or other surfaces; it can be removed simply with water.
Here’s what Kinne says are the steps to working with plaster on an existing object:
- Mix the plaster. A good formula is roughly 2:1 plaster to water, but there is a lot of variation depending on how you are using the material. Once you get a feel for what you are doing, adjust the ratio to fit your needs.
- Add the plaster to the bucket of water by the handful, slowly rubbing the plaster back and forth in your hands as you bring dip it into the bucket. Dropping the plaster directly into the water will form clumps in the mixture, which weakens the end result.
- Keep sifting and dropping the plaster into the bucket of water until the powder starts to build up over the water line.
- To mix, use your hands to blend the water/ plaster solution until it is smooth and the consistency of a thin pancake mix. (Note: once you mix, you cannot add more plaster or water to the mix, so if it is too thick or too thin, you’ll have to start over.)
- Now it is ready to work with. Spread the plaster in any way that you find texturally appealing. The paste will harden over time, so there is a time limit to how long you have to work. Let dry completely and enjoy your new art! Feel free to paint over the dried texture.
- Caution: Do NOT discard unused plaster down the drain (it will eventually set and you will have plumbing issues)
Kinne is currently developing a new body of work revolving around tactility using plaster. Learn more at www.morgankinne.com.